A group of students and I decided that our first independent lab of the semester would be a fun 3 days of creating rock candy! The first two days, we all made our individual strings of candy. I made mine on the first day, and assisted others on the second day.
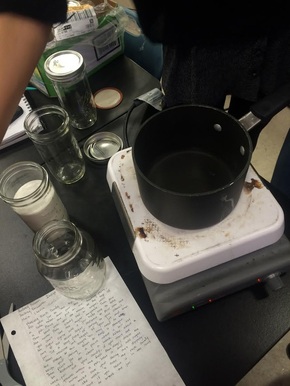
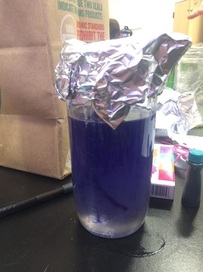
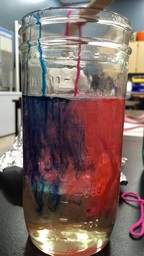
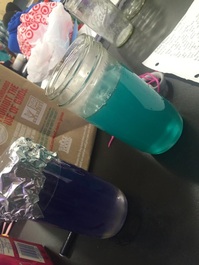
We all made our individual strings the same way. Using Andrews hot plate, we heated 1 cup of water in saucepan, just until the surface was steaming. We then slowly stirred in two cups of sugar, until it was completely dissolved into a syrupy sugar water mix. We then poured it into mason jars that I brought in and added in whatever color of food coloring we desired (mine was purple!) After this, we tied a piece of string to a popsicle stick and measured the string from the top to the bottom of the glass. We cut this string to the length of the jars and then tried to submerge it into the liquid. It wouldn't go in though! The mixture was too thick! An easy fix however, we just poked the string under the liquid with an extra popsicle stick, removed the string and then slid it back down easily in a straight line, to the bottom. To avoid them getting disturbed while the sugar crystalized, we covered them with foil and blocked of an area where they could sit for the next week.
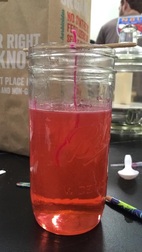
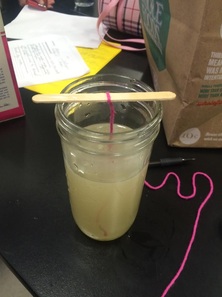
On the third day, after everyone had made a jar, Andrew told us that he had flavoring that we could add! (The flavoring would only work if we were to sprinkle citric acid on the candy after it had crystalized, otherwise it would only smell.) We each took our desired flavorings and used pipettes to add a few drops to each mixture (I chose mango!) Now, until sometime between the week of February 8th-12th (when we remove the string from the mixture, the sugar crystals will, hopefully, form around the string. This process is called nucleation, in this case it refers to the process of the liquid forming into a crystalline solid structure around the string. This was all very interesting to us because typically when you think of a liquid becoming a solid, you think of freezing, but clearly that is not what's occurring here! Making candy sounded like lots of fun too! Below are pictures documenting our experiment. I'll be sure to update my blog with the final product this week too!
We all made our individual strings the same way. Using Andrews hot plate, we heated 1 cup of water in saucepan, just until the surface was steaming. We then slowly stirred in two cups of sugar, until it was completely dissolved into a syrupy sugar water mix. We then poured it into mason jars that I brought in and added in whatever color of food coloring we desired (mine was purple!) After this, we tied a piece of string to a popsicle stick and measured the string from the top to the bottom of the glass. We cut this string to the length of the jars and then tried to submerge it into the liquid. It wouldn't go in though! The mixture was too thick! An easy fix however, we just poked the string under the liquid with an extra popsicle stick, removed the string and then slid it back down easily in a straight line, to the bottom. To avoid them getting disturbed while the sugar crystalized, we covered them with foil and blocked of an area where they could sit for the next week.
On the third day, after everyone had made a jar, Andrew told us that he had flavoring that we could add! (The flavoring would only work if we were to sprinkle citric acid on the candy after it had crystalized, otherwise it would only smell.) We each took our desired flavorings and used pipettes to add a few drops to each mixture (I chose mango!) Now, until sometime between the week of February 8th-12th (when we remove the string from the mixture, the sugar crystals will, hopefully, form around the string. This process is called nucleation, in this case it refers to the process of the liquid forming into a crystalline solid structure around the string. This was all very interesting to us because typically when you think of a liquid becoming a solid, you think of freezing, but clearly that is not what's occurring here! Making candy sounded like lots of fun too! Below are pictures documenting our experiment. I'll be sure to update my blog with the final product this week too!
 RSS Feed
